FortiGate SSL VPN MFA Setup with Mideye (FortiOS 7.x)
This guide describes how to configure FortiGate SSL VPN (FortiOS 7.x) to use Mideye Server as a RADIUS server for multi-factor authentication (MFA).
FortiGate acts as a RADIUS client toward Mideye Server.
| Component | Versions |
|---|---|
| FortiOS | 7.0.x / 7.2.x / 7.4.x (verified on 7.4.4) |
| Mideye Server | 5.x / 6.x |
Architecture
Section titled “Architecture”Requirements
Section titled “Requirements”- Mideye Server 5 or 6
- UDP port 1812 open from FortiGate to Mideye Server
- FortiGate added as a RADIUS client in Mideye Server
- Shared secret must match on both systems
Known Limitations
Section titled “Known Limitations”Dynamic RADIUS reject messages
Section titled “Dynamic RADIUS reject messages”FortiGate does not support displaying dynamic RADIUS reject messages to end users. If authentication fails (for example, because a mobile phone is unreachable), the user will see a generic error instead of the specific Mideye error message.
FortiClient mobile
Section titled “FortiClient mobile”FortiClient for mobile devices does not support RADIUS challenge-response correctly. Users may see:
Bad host name - HTTP/1.1 401 Authorization RequiredWeb-based SSL VPN and FortiClient desktop work correctly.
Configuration Steps
Section titled “Configuration Steps”1. Create Internal Network Objects
Section titled “1. Create Internal Network Objects”Navigate to Policy & Objects → Addresses.
Create address objects for your internal networks.
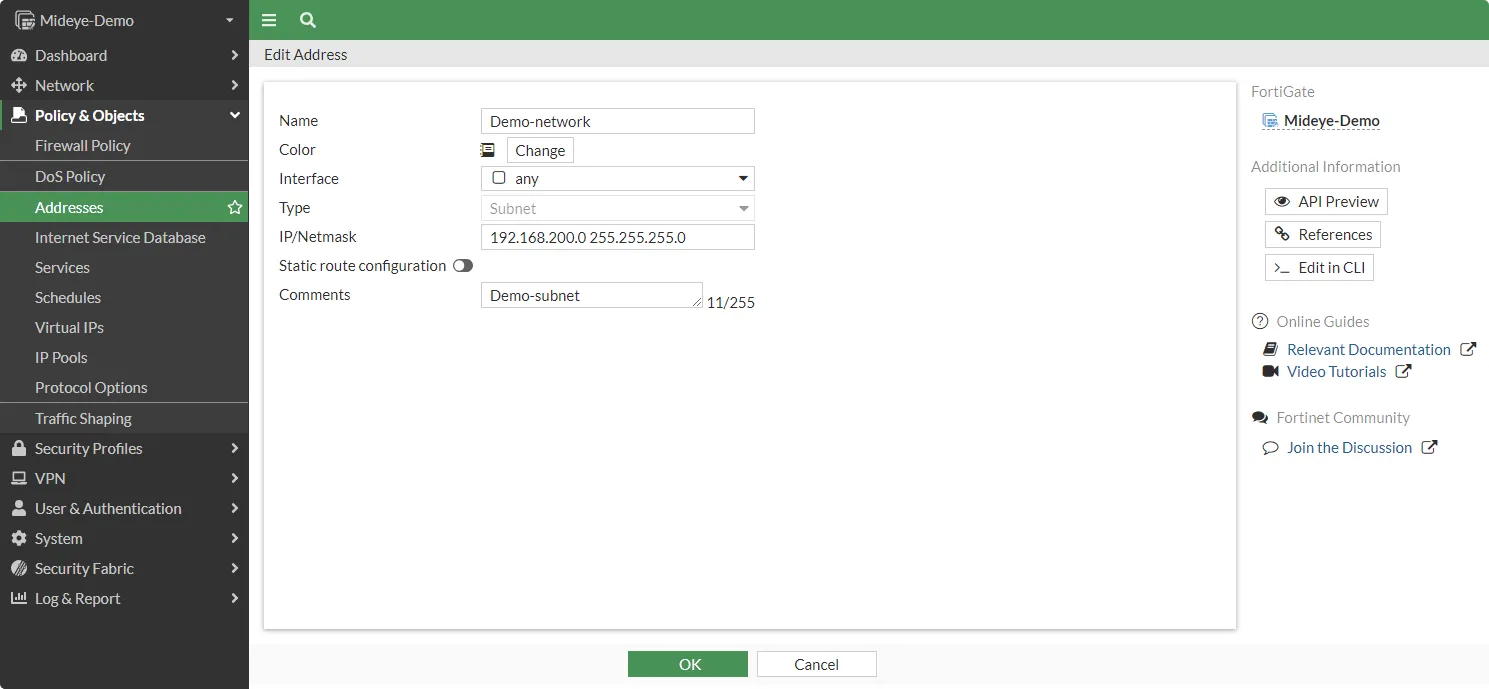
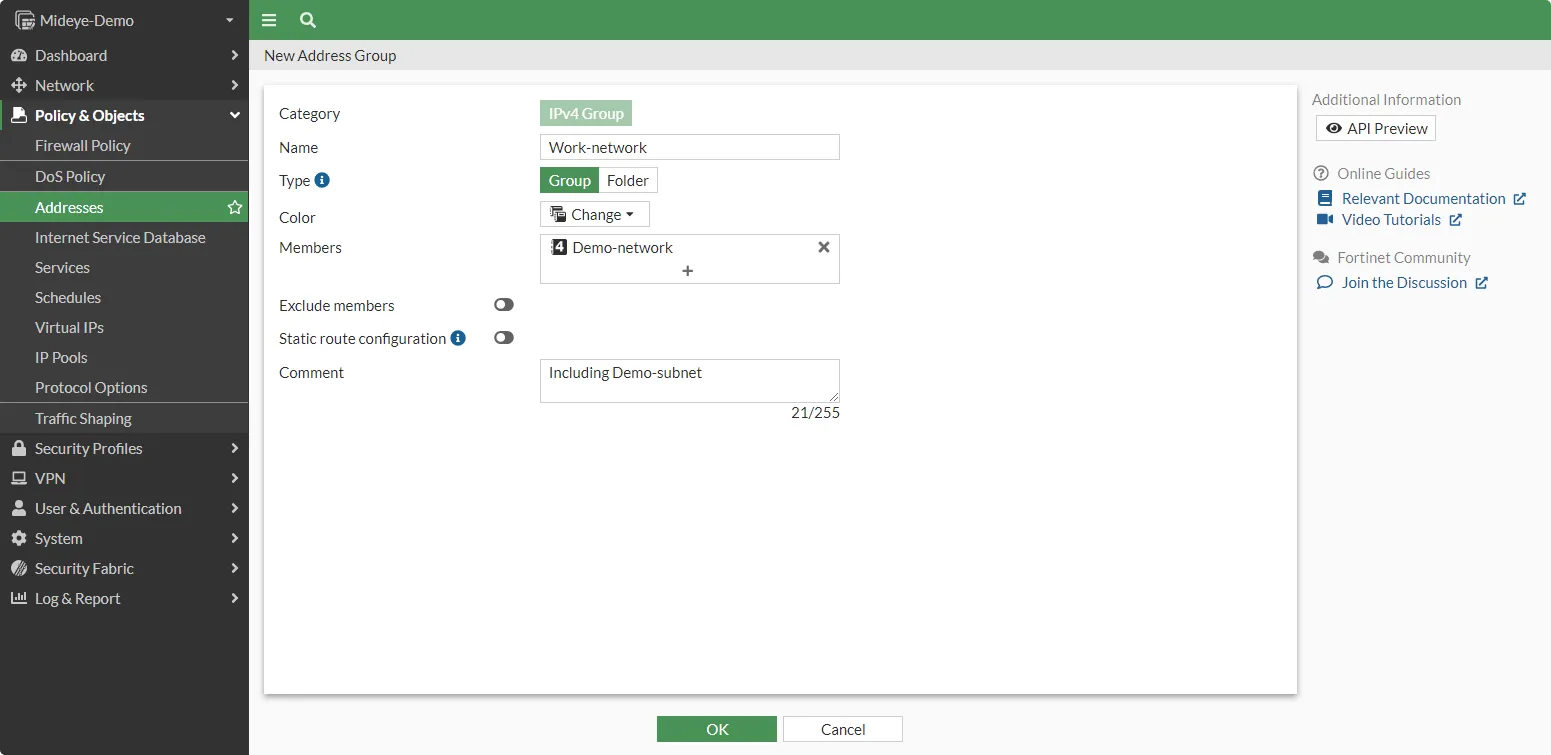
If multiple networks exist, create an Address Group under Policy & Objects → Addresses → Address Group.
2. Configure SSL VPN IP Pool
Section titled “2. Configure SSL VPN IP Pool”By default, FortiGate assigns remote users an IP range of 10.212.134.200–10.212.134.210.
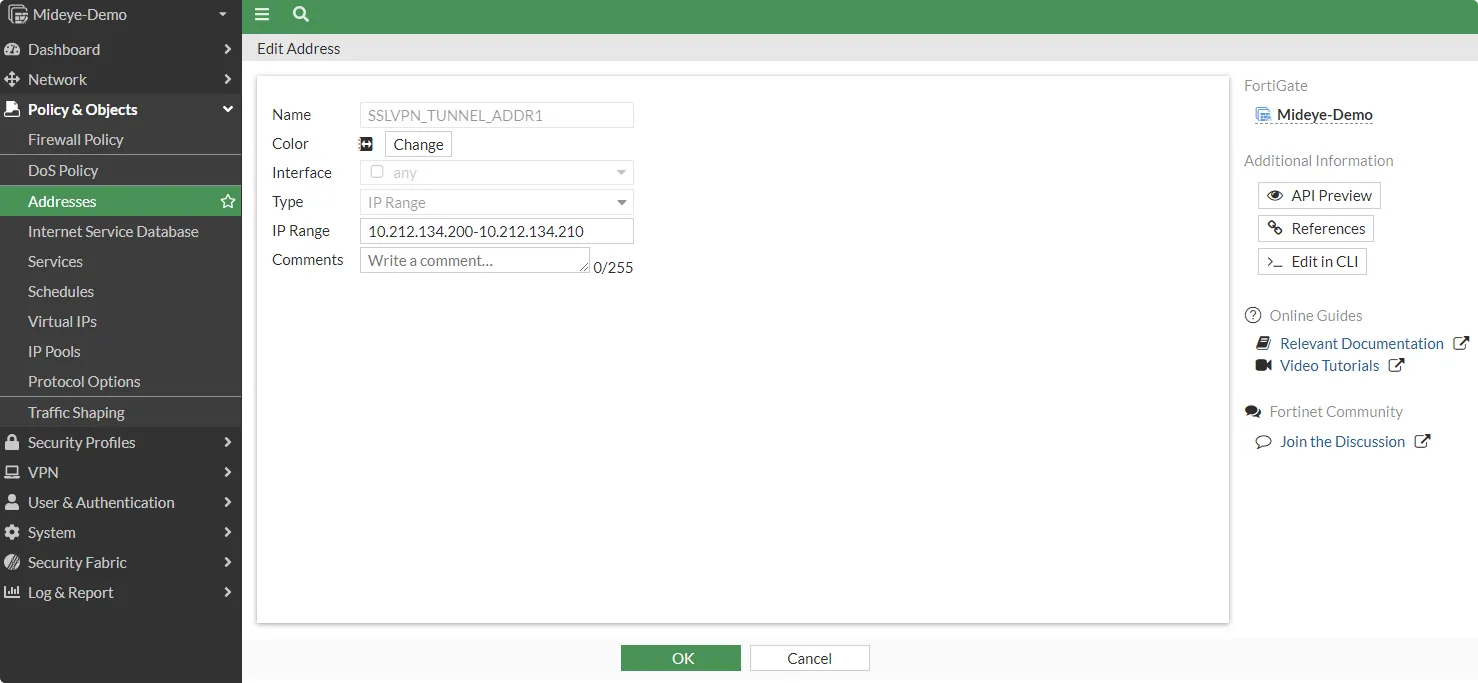
If this conflicts with your IP allocation, navigate to Policy & Objects → Addresses and create a new IP Range object. Update the SSL-VPN Portal to use the new range.
3. Add Mideye as RADIUS Server
Section titled “3. Add Mideye as RADIUS Server”Navigate to User & Authentication → RADIUS Servers and click Create New.
| Setting | Value |
|---|---|
| Name | Mideye |
| IP/Name | Mideye Server IP address |
| Secret | Shared secret (must match Mideye) |
| Authentication Method | Default |
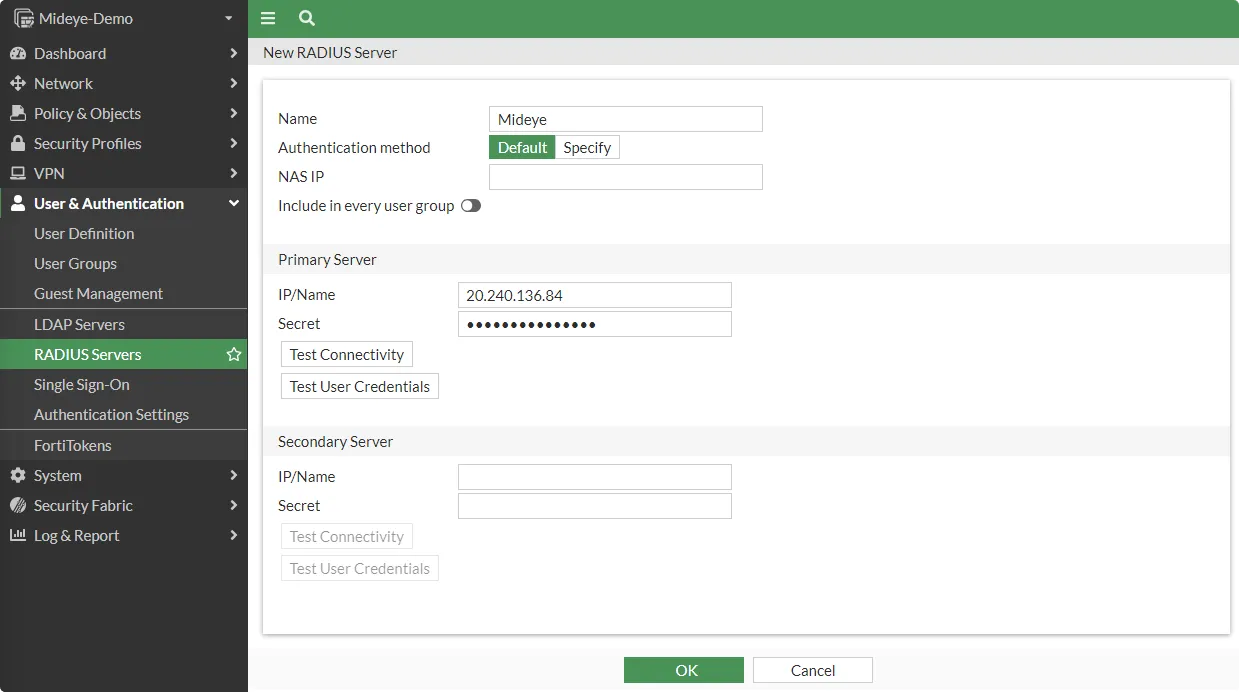
FortiGate must also be defined as a RADIUS client in Mideye Server.
4. Configure NAS-ID
Section titled “4. Configure NAS-ID”By default, FortiGate uses its hostname as the NAS-ID. To avoid mismatches (especially in HA deployments), configure a custom NAS-ID.
Open the FortiGate CLI:
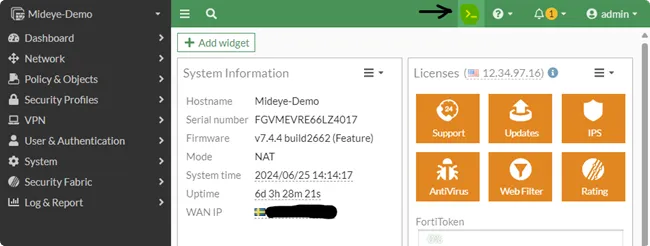
Run:
config user radius edit Mideye set nas-id-type custom set nas-id <your-custom-nas-id> nextend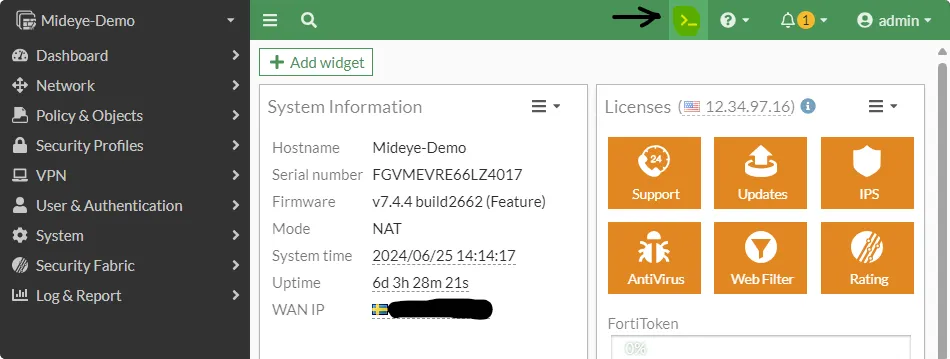
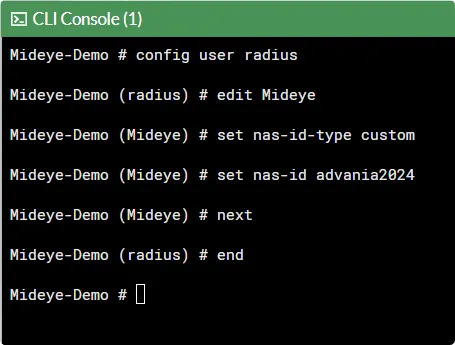
The same NAS-ID must be configured in Mideye Server.
5. Create SSL-VPN User Group
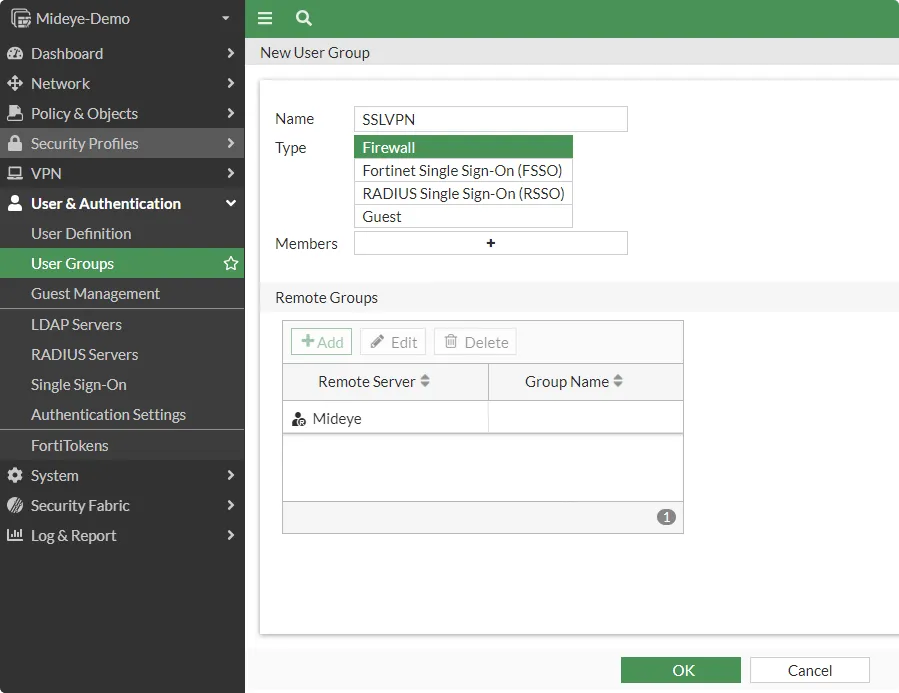
Section titled “5. Create SSL-VPN User Group”Navigate to User & Authentication → User Groups and click Create New.
| Setting | Value |
|---|---|
| Name | SSLVPN |
| Type | Firewall |
| Remote Groups | Add the Mideye RADIUS server |
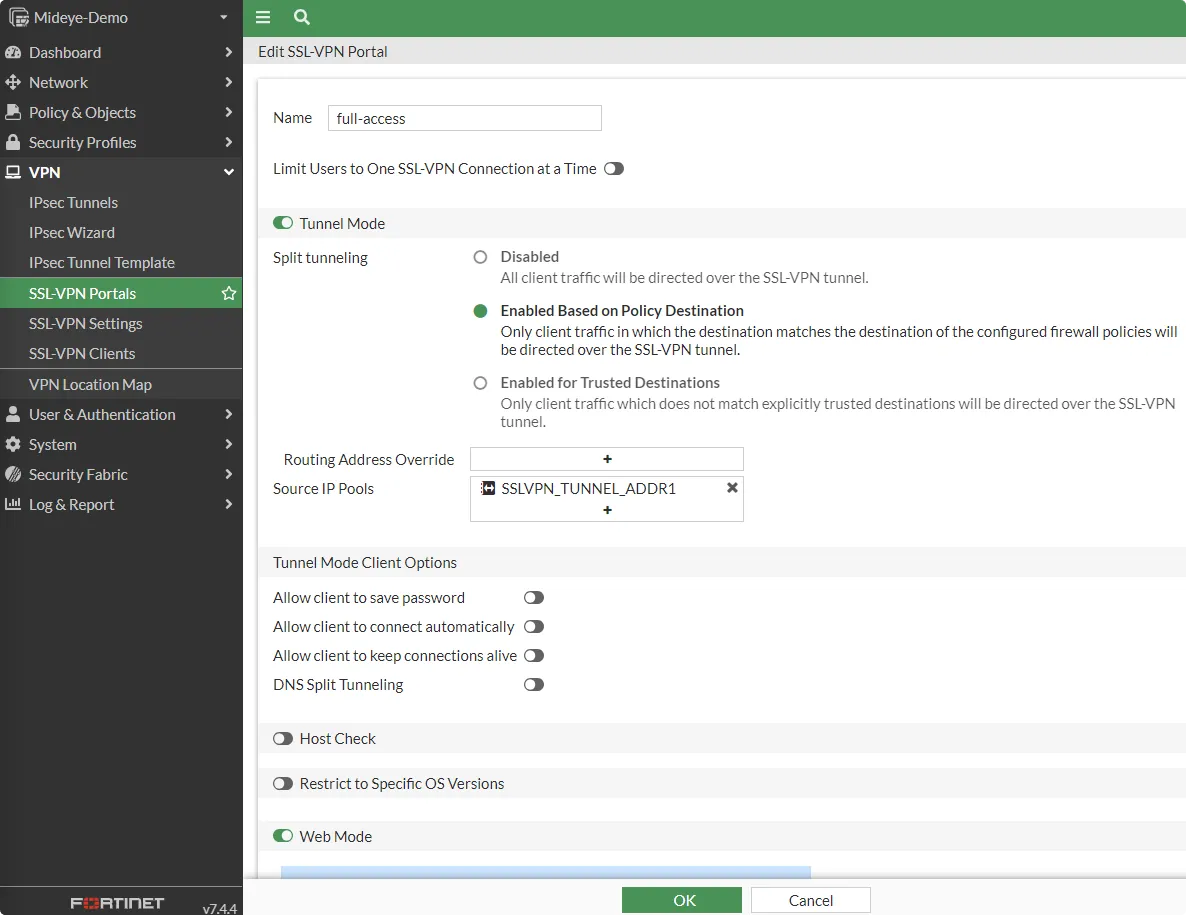
6. Configure the SSL-VPN Portal
Section titled “6. Configure the SSL-VPN Portal”Navigate to VPN → SSL-VPN Portals and edit full-access (or create a new portal).
- Enable Tunnel Mode
- Set Source IP Pools to
SSLVPN_TUNNEL_ADDR1or the custom range created in step 2
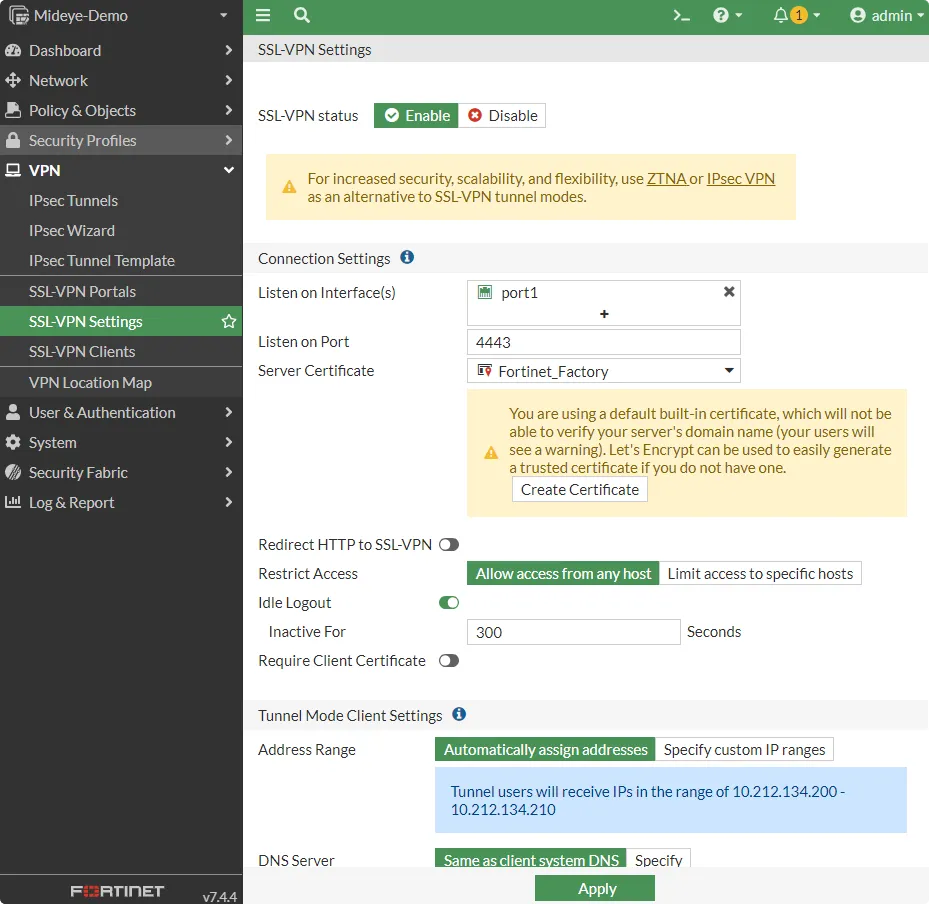
7. Configure SSL-VPN Settings
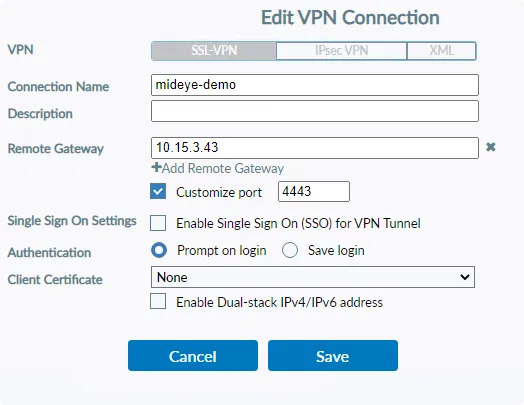
Section titled “7. Configure SSL-VPN Settings”Navigate to VPN → SSL-VPN Settings.
- Set Listen on Interfaces to your WAN interface
- Set Listen on Port (for example,
4443) - Select a server certificate
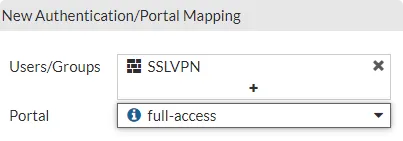
Scroll down to Authentication/Portal Mapping and add the SSLVPN user group created in step 5.
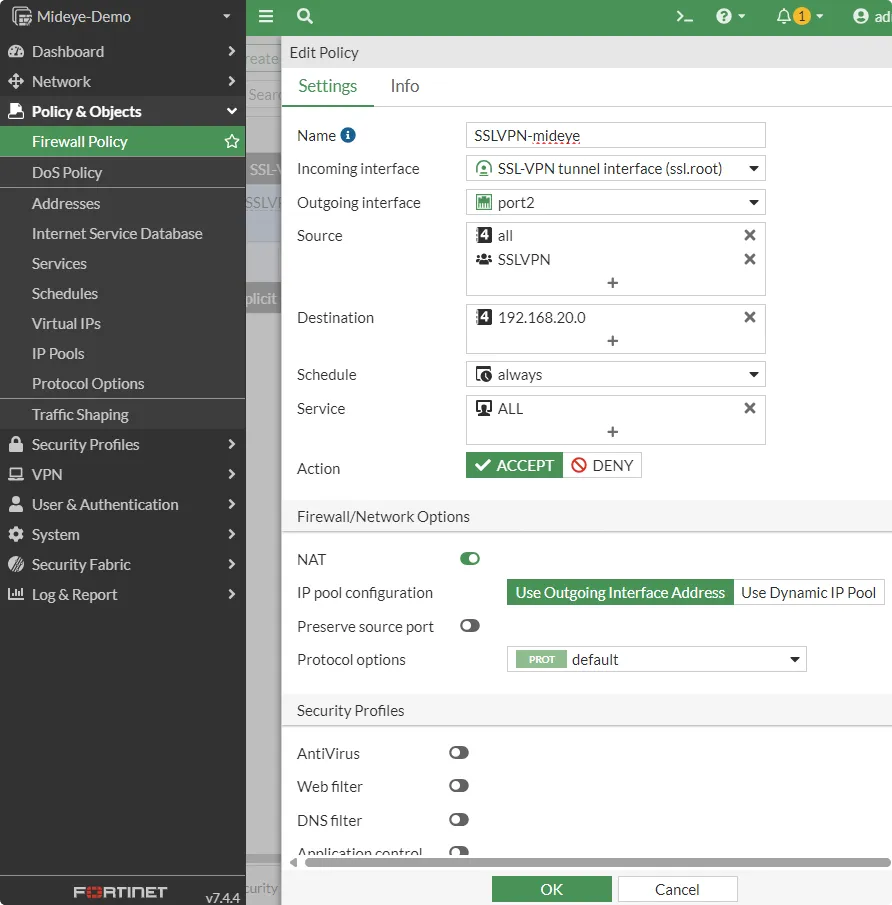
8. Create Firewall Policy for SSL-VPN
Section titled “8. Create Firewall Policy for SSL-VPN”Navigate to Policy & Objects → Firewall Policy and click Create New.
| Setting | Value |
|---|---|
| Incoming Interface | ssl.root (SSL-VPN tunnel interface) |
| Outgoing Interface | Internal LAN interface |
| Source — Address | all |
| Source — User | SSLVPN |
| Destination — Address | Internal network |
| Service | ALL |
| Action | Accept |
| NAT | Enabled |
9. Increase RADIUS Timeout
Section titled “9. Increase RADIUS Timeout”Open the CLI and set the timeout to 30 seconds:
config system global set remoteauthtimeout 30end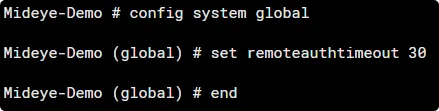
Troubleshooting
Section titled “Troubleshooting”| Symptom | Check |
|---|---|
| Authentication times out | Verify remoteauthtimeout is set to at least 30 seconds (config system global) |
| “Test Connectivity” fails in GUI | FortiGate uses its hostname as NAS-ID for the test — this may not match Mideye. Verify connectivity from the Mideye Server side instead |
| OTP never arrives | Verify UDP port 1812 is open between FortiGate and Mideye Server |
| Shared secret mismatch | Ensure the secret in the RADIUS server matches the Mideye RADIUS client configuration |
| FortiClient mobile shows “401 Authorization Required” | FortiClient mobile does not support RADIUS Challenge-Response — use web-based SSL VPN or FortiClient desktop |
| NAS-ID mismatch after HA failover | Configure a static custom NAS-ID via CLI (step 4) instead of relying on the hostname |
| Generic error instead of Mideye message | FortiGate does not support dynamic RADIUS reject messages — this is a known limitation |
Verification
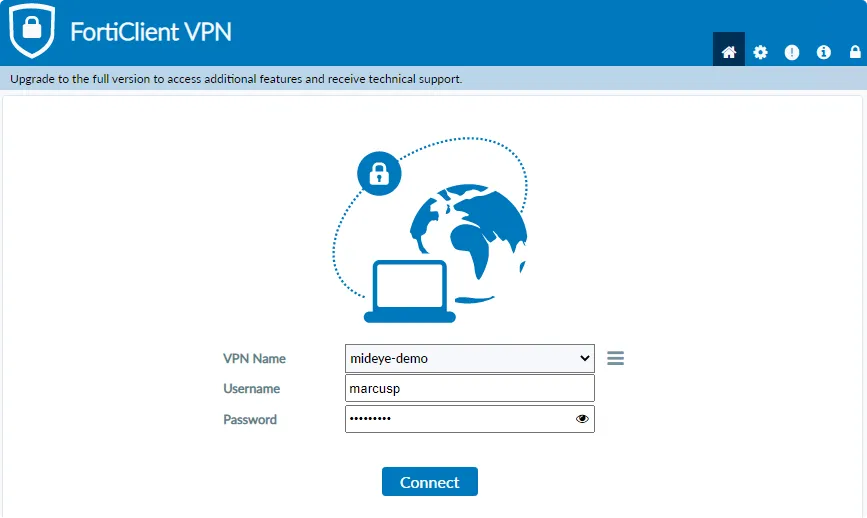
Section titled “Verification”- Connect to the FortiGate SSL VPN using a web browser or FortiClient desktop
- Enter your username and password
- The OTP challenge should appear
- Enter the one-time password — authentication should succeed
Best Practices
Section titled “Best Practices”- Always configure a custom NAS-ID — see step 4
- Increase the remote authentication timeout to at least 30 seconds
- Avoid using FortiClient mobile for challenge-response flows
- Use a trusted certificate instead of the factory default
- Restrict SSL VPN access to specific source addresses where possible
High Availability (HA)
Section titled “High Availability (HA)”If you are running FortiGate in an Active-Passive HA cluster, keep the following in mind for the Mideye RADIUS integration:
- Configure the HA cluster IP as the RADIUS client in Mideye Server — not individual node management IPs
- Use a static custom NAS-ID (see step 4) to prevent NAS-ID mismatches during failover
- Existing SSL VPN sessions may disconnect during failover — users will need to log in again
For FortiGate HA setup and configuration, refer to the FortiOS 7.4 High Availability Administration Guide.
Related links
Section titled “Related links”Mideye documentation
Section titled “Mideye documentation”- RADIUS Clients — add the FortiGate as a RADIUS client in Mideye Server
- RADIUS Integrations — authentication flows and supported auth types
- Authentication Types — all supported Mideye authentication methods
- RADIUS Timeout — how the timeout affects authentication