ADFS Cross-Forest Federation Setup with Mideye
This guide describes how to configure cross-organization (B2B) federation using ADFS with Mideye Assisted Login. The Resource Partner Organization controls access to its applications while the Account Partner Organization authenticates users with their own credentials. Mideye adds an approval step via the Mideye+ app.
| Component | Versions |
|---|---|
| Windows Server (ADFS) | 2022 / 2019 / 2016 |
| Mideye Server | 5.5.4 or later |
Architecture
Section titled “Architecture”Prerequisites
Section titled “Prerequisites”- Both the Resource Partner and Account Partner already have a functional ADFS environment reachable from the internet via a proxy (e.g. WAP).
- The Resource Partner must have a Mideye Server running release 5.5.4 or later.
- The Mideye ADFS Module is installed on the Resource Partner ADFS server.
- Approvers have the Mideye+ app installed and activated.
1. Install the Mideye ADFS package
Section titled “1. Install the Mideye ADFS package”Download the Mideye ADFS package from the Downloads page. Follow the installation instructions in the ADFS Mideye Module guide.
2. Configure the Mideye Service Attribute Store
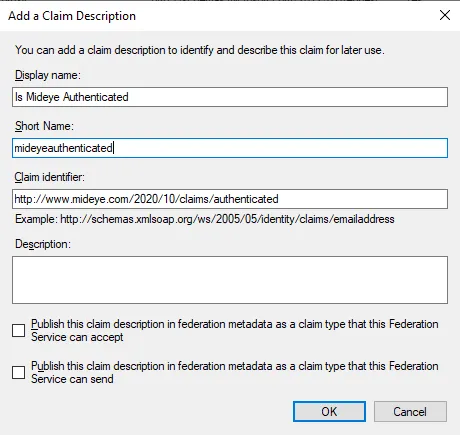
Section titled “2. Configure the Mideye Service Attribute Store”Open the ADFS Management console on the Resource Partner and navigate to Service → Claim Descriptions. Click Add Claim Description.
Add the following properties:
- Display name: Is Mideye Authenticated
- Short Name: mideyeauthenticated
- Claim identifier:
http://www.mideye.com/2020/10/claims/authenticated
Click OK to save.
Next, navigate to Service → Attribute Stores. Click Add Custom Attribute Store.
- Display name: Mideye Attribute Store
- Custom attribute store class name:
Mideye.ADFS.AttributeStore.StrongAuthentication, Mideye.ADFS
Click OK to save.
3. Set up a trust to the Account Partner
Section titled “3. Set up a trust to the Account Partner”Navigate to Claims Provider Trusts and click Add Claims Provider Trust. Complete the wizard by importing the Account Partner’s federation metadata.
Select the new Claims Provider Trust and click Edit Claim Rules. Click Add Rule and select Send Claims Using a Custom Rule.
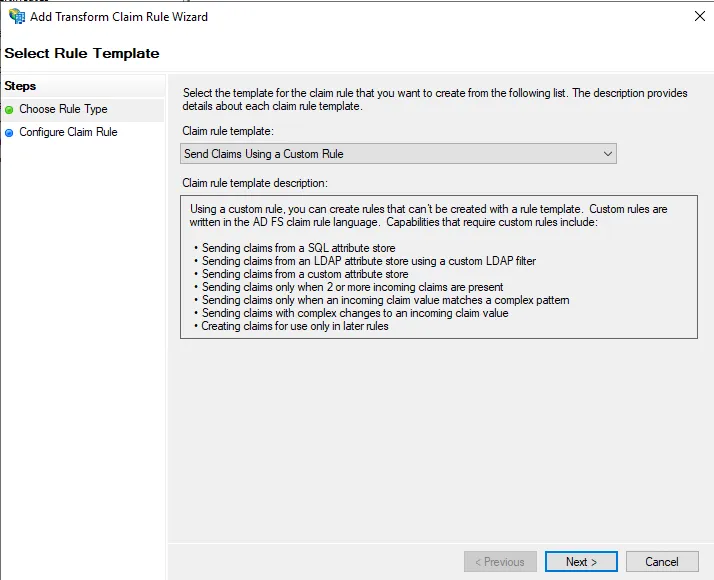
Configure the rule:
- Claim Rule Name: Mideye Assisted Login
- Custom Rule:
c1:[Type == "http://schemas.xmlsoap.org/ws/2005/05/identity/claims/upn"\]&& c2:[Type == "http://schemas.microsoft.com/2012/01/requestcontext/claims/relyingpartytrustid"\]=> issue(store = "Mideye Attribute Store", types = ("http://www.mideye.com/2020/10/claims/authenticated"), query = "AssistedLogin", param = c1.Value, param = c2.Value, param = "", param = "", param = "");Click Finish → OK.
The parameters are:
| Parameter | Description |
|---|---|
| Param1 | UserID (UPN) |
| Param2 | Resource Identifier (relying party trust ID) |
| Param3 | User Display Name (optional) |
| Param4 | Company Name (optional) |
| Param5 | MSISDN (optional) |
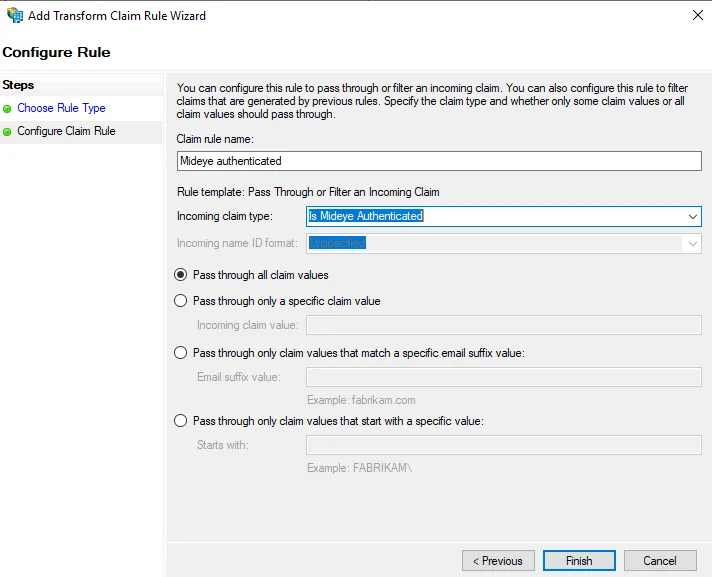
4. Edit the published ADFS-enabled web application
Section titled “4. Edit the published ADFS-enabled web application”Navigate to Relying Party Trusts. Select the relying party for the published web application and click Edit Claim Issuance Policy. Click Add Rule → select Pass Through or Filter an Incoming Claim → Next.
Set the claim rule name to Mideye Authenticated and select Is Mideye Authenticated as the incoming claim type.
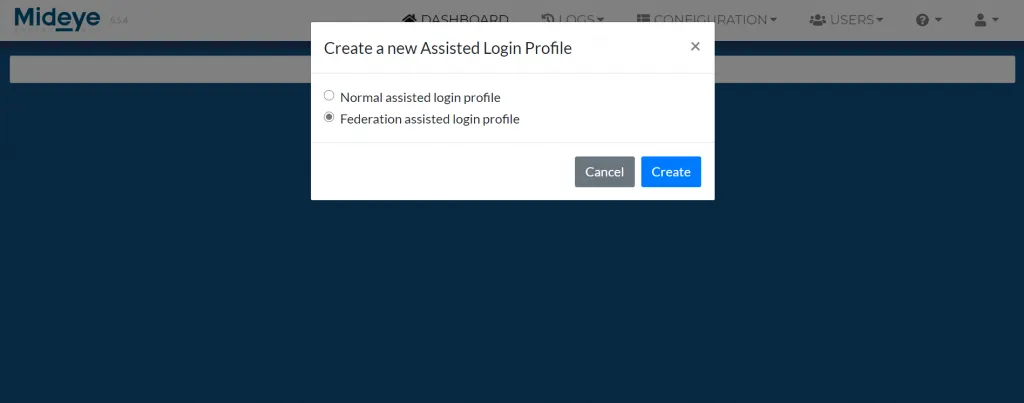
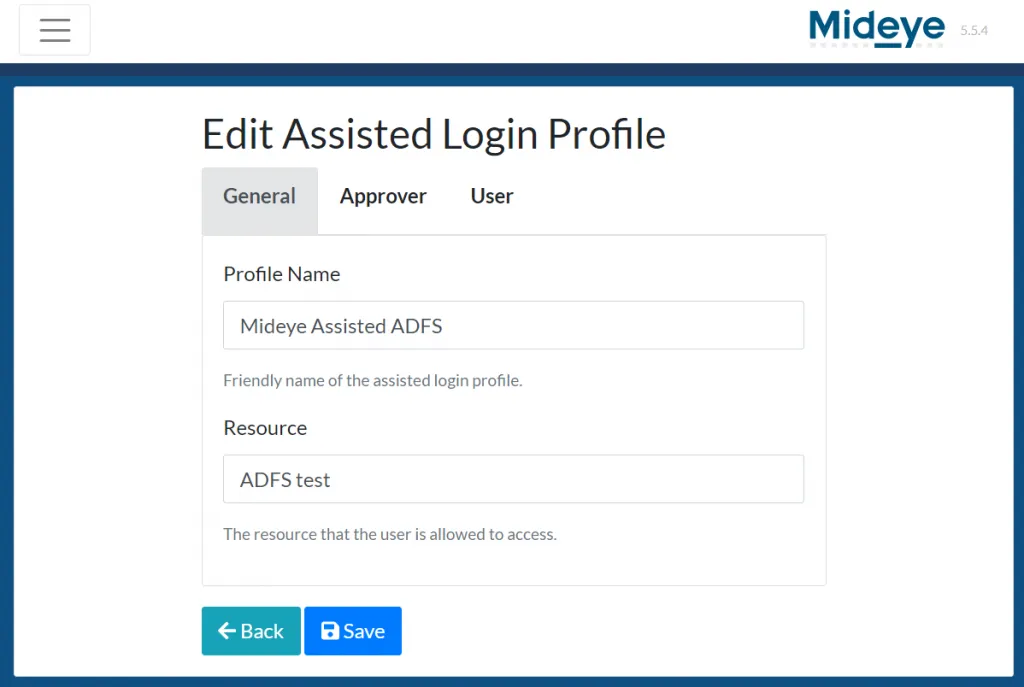
5. Configure Mideye Server
Section titled “5. Configure Mideye Server”-
Log in to the Mideye Server WebGUI → Configuration → Assisted Login Profiles → click + → select Federation Assisted Login Profile → Create.
-
Give the profile a friendly name. The Resource field must match the name of the relying party trust.
To verify the relying party name:
Terminal window Get-AdfsRelyingPartyTrust -Name "name of relying party"Copy the output from the Name row.

-
Paste the name into the Resource field.
-
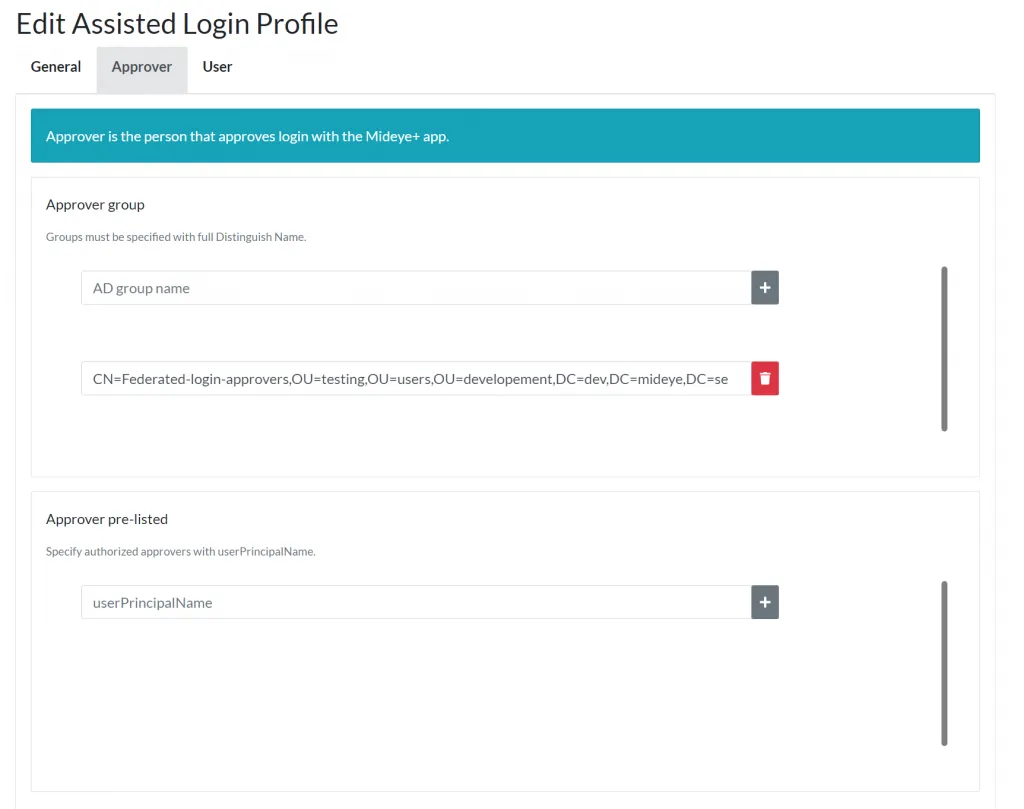
Navigate to the Approver tab. Specify a group (in DN format) or individual users (by UPN) who can approve logins.
-
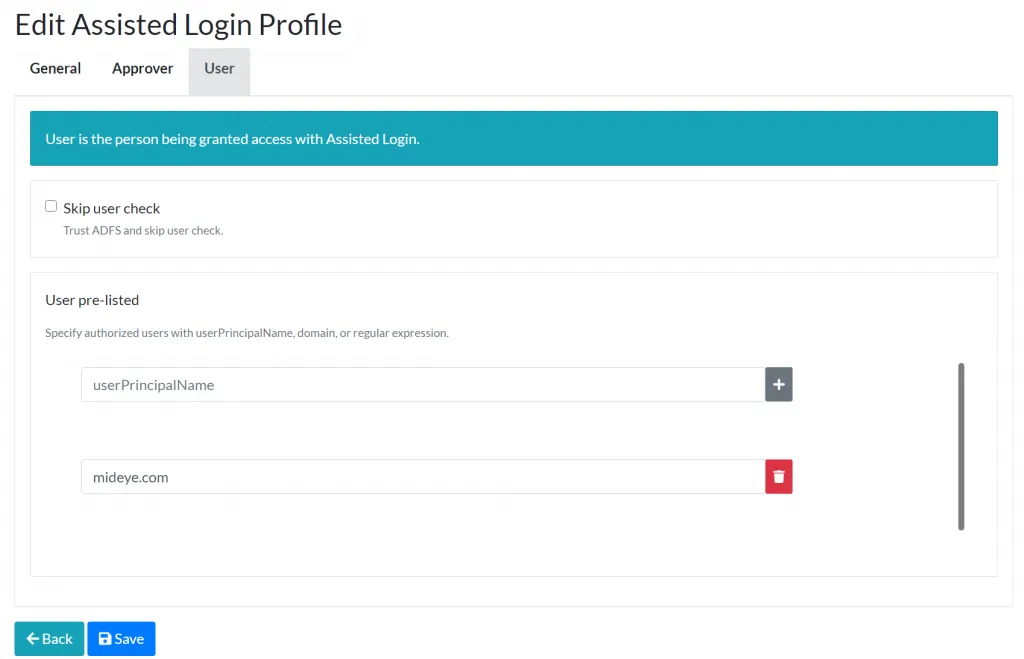
Navigate to the User tab. Configure when to trigger assisted login using UPN, domain, or regular expression.
-
Click Save.
-
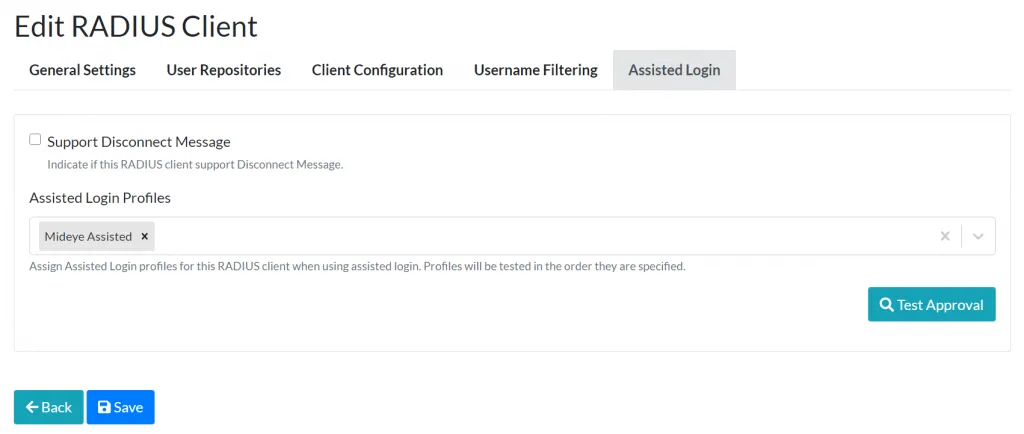
Navigate to Configuration → RADIUS Clients. Edit the RADIUS client created for ADFS → Assisted Login tab → add the federation assisted login profile → Save.
6. Add a relying party trust from the Account Organization
Section titled “6. Add a relying party trust from the Account Organization”On the Account Partner’s ADFS server, open the ADFS Management console → navigate to Relying Party Trusts → click Add Relying Party Trust → complete the wizard using the Resource Partner’s federation metadata.
Troubleshooting
Section titled “Troubleshooting”| Symptom | Check |
|---|---|
| No push notification sent to approvers | Verify the assisted login profile is assigned to the RADIUS client, and that approvers are correctly configured (UPN or DN group). |
| Claim rule not triggering | Check that the custom claim rule references the correct attribute store class name. Verify claims are flowing with the ADFS debug log. |
Mideye Attribute Store not found | Ensure the attribute store class name is exactly Mideye.ADFS.AttributeStore.StrongAuthentication, Mideye.ADFS. The ADFS module must be installed. |
| Login fails after successful approval | Verify the Resource field in the assisted login profile matches the relying party trust name exactly (case-sensitive). |
| Redirect loop between organizations | Check that both ADFS environments have correct federation metadata imported and that the trust is bidirectional. |
Related links
Section titled “Related links”Mideye documentation
Section titled “Mideye documentation”- ADFS Mideye Module — install and configure the Mideye ADFS integration
- Assisted Login Profiles — reference for assisted login configuration
- RADIUS Clients — add ADFS as a RADIUS client
- Windows Integrations — overview of all Windows integration options
- Downloads — latest Mideye ADFS Module installer
Official Microsoft documentation
Section titled “Official Microsoft documentation”- AD FS Claims Provider Trust — configure claims provider trusts
- Custom Attribute Stores in AD FS — attribute store development reference
- AD FS Claim Rules — claim rule language reference