Mideye Server 5 Initial Configuration Wizard
Overview
Section titled “Overview”After installing Mideye Server 5, complete the initial configuration through the Web GUI wizard. This guide walks you through setting the root password, connecting to Mideye Switch, configuring LDAP integration, and adding your first RADIUS client.
What this wizard configures:
- Root administrator password
- Mideye Switch connection (required for OTP delivery)
- LDAP/Active Directory integration (optional)
- First RADIUS client (optional)
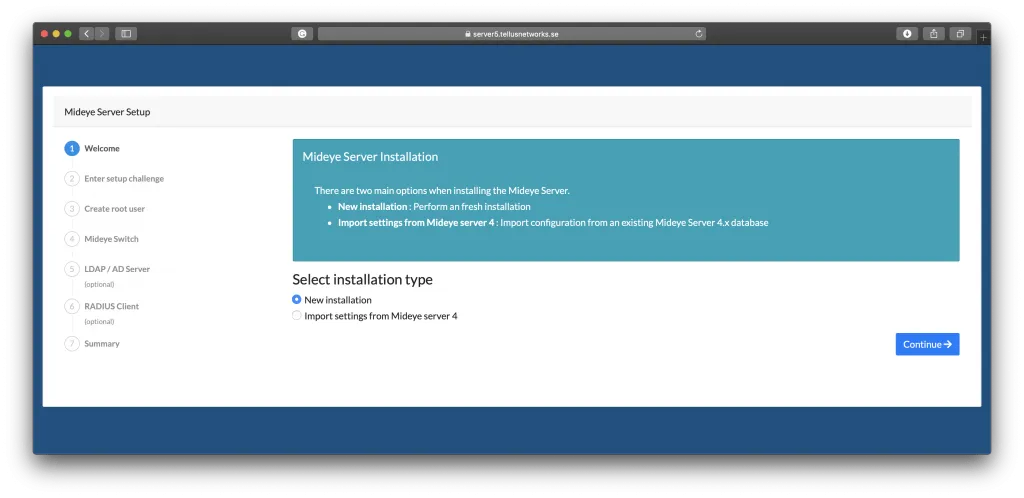
The first time browsing to Mideye Web GUI, two options will be presented:
- New installatiion - create a fresh installation
- Import settings from Mideye Server 4 - import settings when migrating from a Mideye Server 4 (4.6.5 or above)
New installation
Section titled “New installation”This section describes how to perform a new installation of Mideye Server 5.
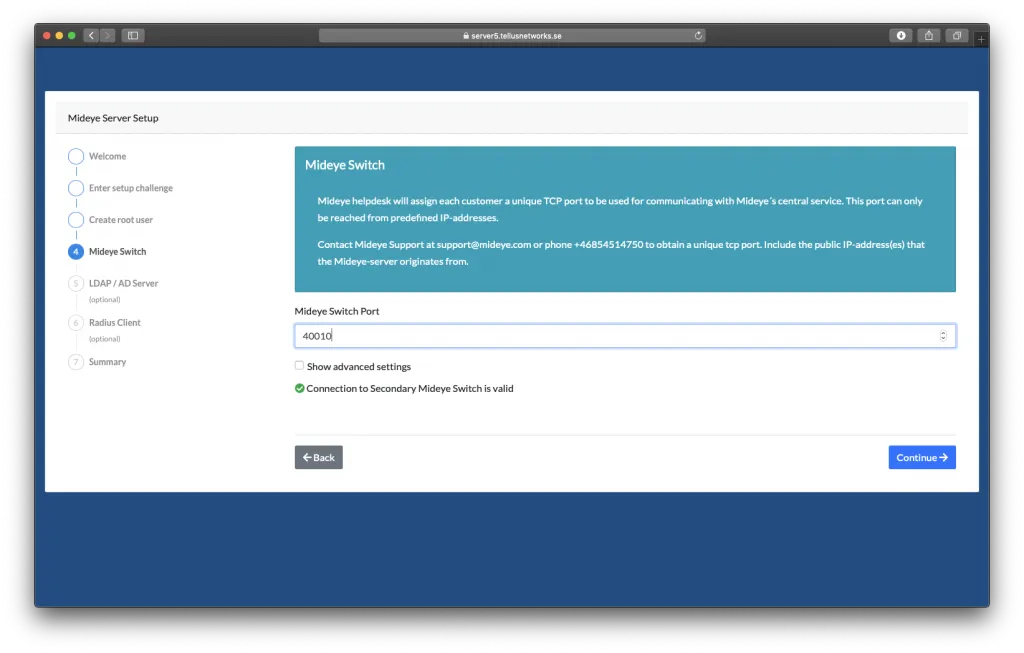
Before proceeding, make sure to have the customer-specific TCP port available. Contact support@mideye.com for further information.
Select the installation type “New Installation”.
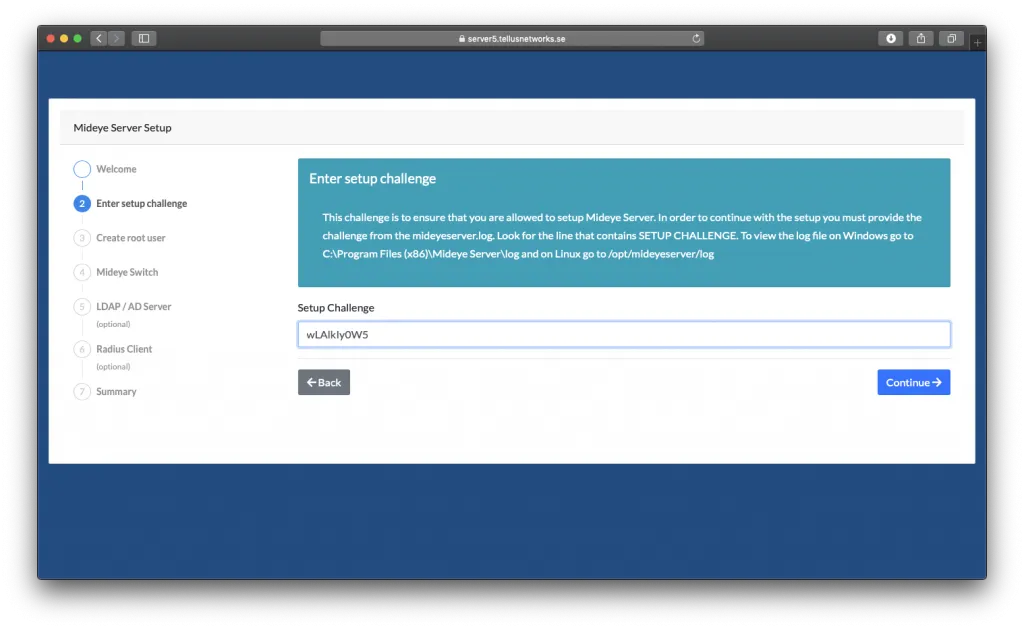
To protect the web interface from unauthorized access, a challenge from the Mideye Server logs must be fetched before proceeding. This challenge can only be accessed by local administrators and is by default located in: === “Windows”
`C:\Program Files (x86)\Mideye Server\log\mideyeserver.log`=== “Linux”
`/opt/mideyeserver/log/mideyeserver.log`Copy the SETUP CHALLENGE from the Mideye Server log, and paste it in to the wizard.
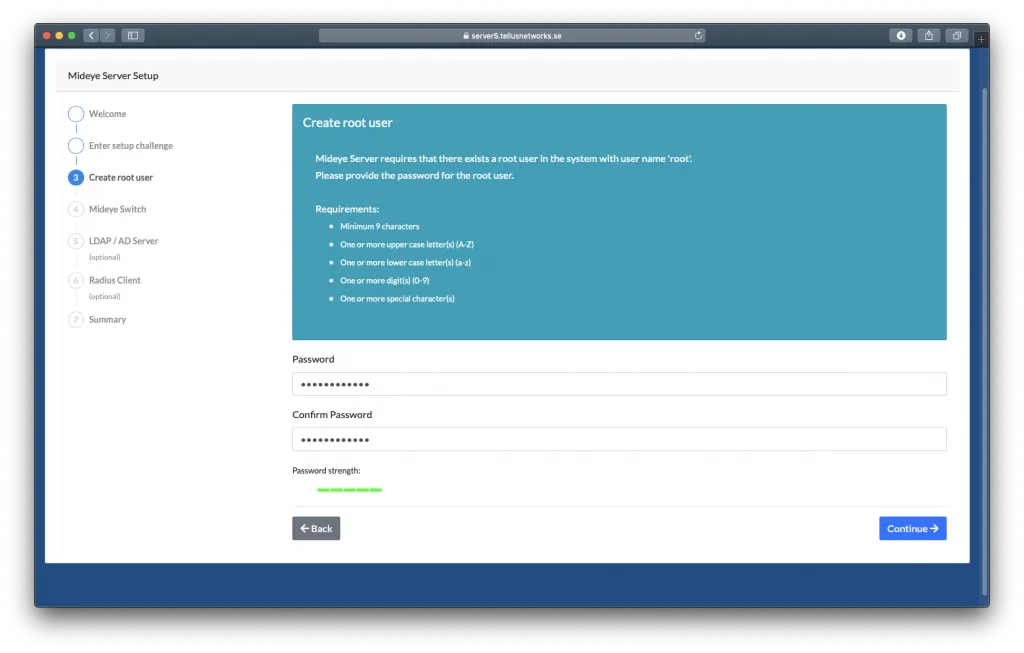
Create a strong password for the root user.
Enter the customer-specific TCP port obtained from Mideye Support. The Web GUI will automatically try to connect to Secondary Mideye Switch based on the TCP port provided, and the connection must be established before proceeding.
When “Connection to Secondary Mideye Switch is valid” shows up with a green dot, select “Continue”.
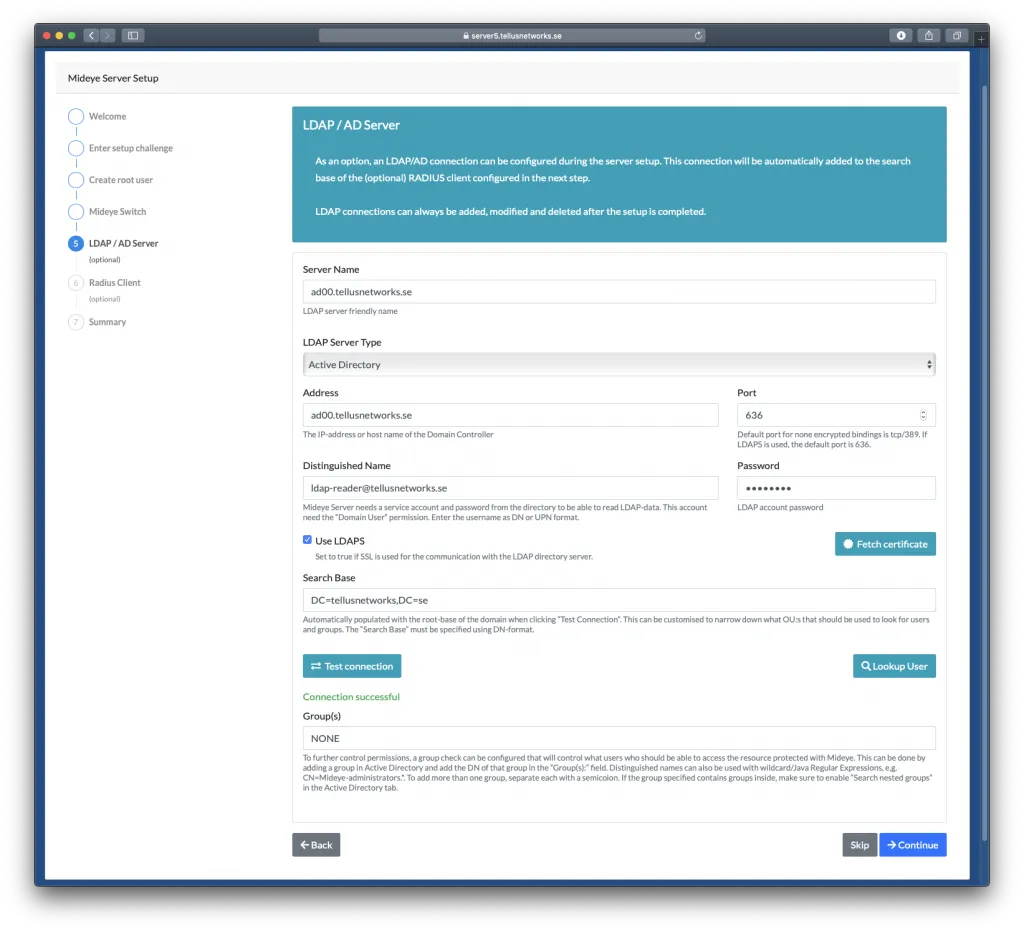
The next step of the initial server configuration will add an LDAP profile for searching user accounts. This step is optional and by clicking “Skip”, this step can be ignored.
- Give the LDAP profile a friendly name.
- Choose “LDAP Server Type”.
- Add the IP or the hostname of the LDAP server. If LDAPS is to be used the address needs to be the hostname.
- Specify which port to use.
- The Mideye server needs a service account with read permissions to the LDAP catalog. The account can be specified with DN or with UPN.
- Check the LDAPS box if TLS protection should be used. Make sure to select the correct port if enabled. Click “Fetch certificate” to import the certificate.
- Add the search base of the LDAP directory. This must be specified in DN-format.
Click “Test connection” to verify the settings, and try to find a user with the “Find User” button. As an option, user search can be restricted to certain groups by adding group names (DN format) in the Group(s) field.
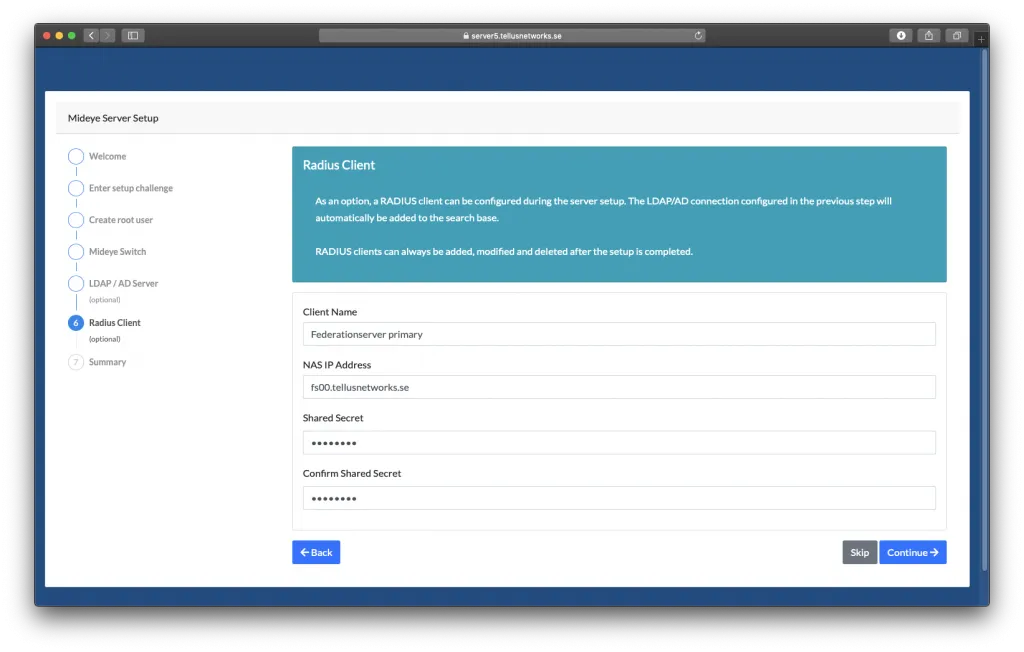
Final step is to add a RADIUS client. This step is optional and can also be done later.
- Give the RADIUS client a friendly name.
- Specify an IP or hostname of the client.
- Add a shared secret for the RADIUS client.
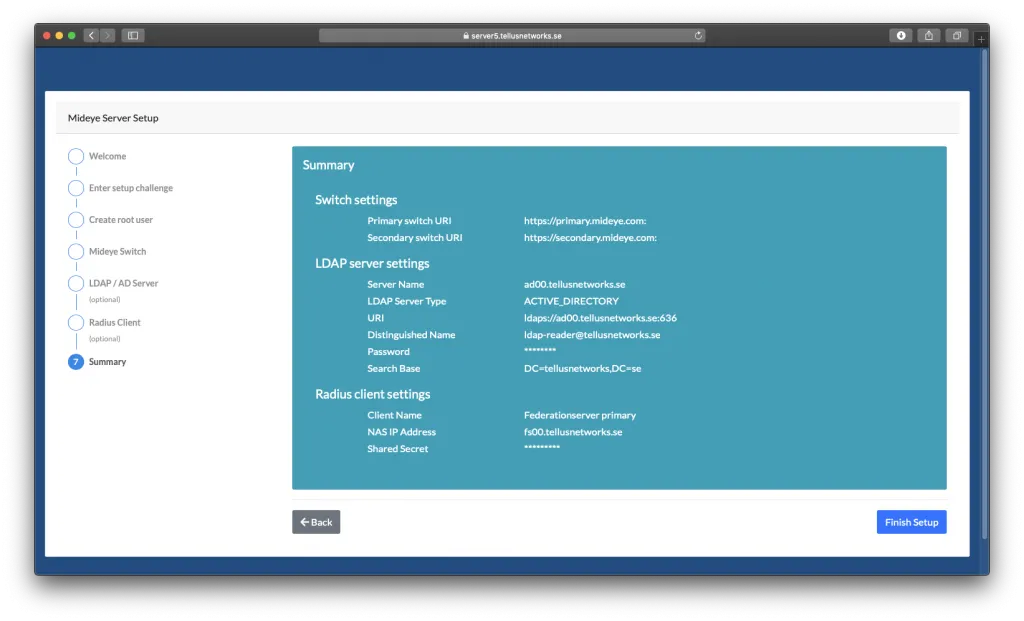
Review the configuration and click “Finish Setup”
Once the initial server configuration is done, simply login to the Web GUI using the root account. For further configuration of the Mideye Server, see the Reference Guide.